15 Sep Creating a Home Voiceover Setup
If you’ve always wanted to expand your voice acting career, right now is a great time to create a home voiceover setup! Many actors are actually experiencing an increase in voiceover opportunities since animation projects are much more pandemic-proof than live action projects. The good news is that you can create a basic home voiceover setup without breaking the bank. If you are not yet ready to create an elaborate sound-proof booth, but rather, just want a home voiceover setup that will allow for good quality auditions (that is a few steps above you sitting under a pile of blankets in your closet with your phone — though this will do the trick if you are in a total pinch!) then you have landed on the right article.

Here are some tips for creating a great home voiceover setup:
Choose the best recording spot
Usually, this is your closet. Basically, you want to choose the room in your home with the least amount of echo. Please do not record in your bathroom! Or in a giant living room with high ceilings. Closets are generally great because the clothing in your closet can absorb sound. Small bedrooms are also good options because the bed and blankets will absorb sound. Also, you can hang a blanket, or affix some foam to the wall, right behind your microphone stand.
Get a great microphone!
As mentioned, if you are in a pinch, you can use your smartphone for an audition — but know that you are auditioning alongside career voice actors who have soundproof home studios. If you are invested in your voice acting career, it’s definitely important to learn the art of microphone usage. Not only will you enhance the quality of your auditions but you will also get extra practice using a microphone. Many actors start with USB microphones because these are simpler to use and don’t require an audio interface (they plug straight into your laptop). However, if you are in this game for the long run, then you might want to consider purchasing a microphone that requires an interface. Since most top-grade microphones require interfaces, you’ll basically be training yourself up for using any microphone in the future. For actors who are just starting out with home voiceover setups, a popular USB microphone is the Blue Yeti, and a popular audio interface microphone is the Audio Technica 2020. (Tip: there are tons of reviews of different USB and audio interface microphones on Youtube, in which you can listen to people comparing the microphones!)
Get an audio interface.
If you’ve decided against a USB microphone, you will need to get an audio interface. The audio interface takes the electrical signal from the microphone, amplifies it using a preamp, and converts it into a stream of digital data that your computer can understand. Audio interfaces usually connect to the computer using a USB cable. An example of a great, compact, audio interface is the Focusrite Scarlett Solo 3rd Gen. With that, you will also need an XLR cable to connect the microphone to your interface. I promise, it’s a very simple setup.
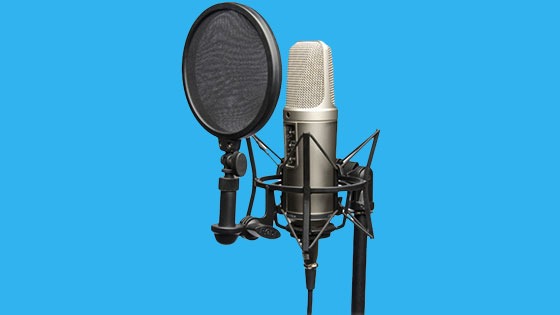
Grab a boom mic stand and a pop filter.
Both of these items are pretty inexpensive — and both are essential! The pop filter filters out your plosive sounds — so words that start with the letter p, for example, and allow for an overall cleaner track. The boom stand will enable you to stand up while recording. As actors, we know that we produce the most resonant sounds when we are standing up, and centered in our bodies.
Don’t forget your headphones!
You’ll need some solid quality headphones while you are recording — especially if you are a singer and are playing back music from your laptop while you record vocals. It’s best to get round-ear, closed-back headphones for monitoring. This ensures that the audio from the headphones doesn’t leak into the track.
Have fun!
Enjoy building your own home audio setup. The process of learning new technology is very empowering. You are on your way to the next step of your voice acting career!


